DIY cards,

DIY Christmas Cards for Kids

08:46 Natalie Karine 0 Comments

Hi again! Last week, my students made some awesome gifts for their parents: a pine cone ornament and some beautiful collage cards. They had the choice between making a collage reindeer or a tree. I brought my funky patterned x-mas paper and look at the results! Magnificent!

Materials:
❄ coloured cardstock
❄ construction paper
❄ patterned paper
❄ glue
❄ scissors


Reindeers! Had a stencil to trace for the head and nose.
Awesome trees! Just start with a big triangle!
All wrapped up!
I wonder if they'll be able to wait til december 25 to give them!


0 commentaires:

DIY crafts,

Pine Cone Ornaments

08:37 Natalie Karine 0 Comments


Hi there! The holidays are here and you know what that means: CRAFTS! My students were so excited when I told them we would have an afternoon of crafts last weeks (And I was too!). We made some cards and pine cone ornaments for the tree. We made some cute reindeers with some pipe cleaners, googly eyes, pompoms, ribbon and lots of hot glue. The only propblem was getting my pine cones all clean before the craft....


My parents have a huge pine tree in their front yard, so my mom gathered about 40 pine cones (and they are FREE!) Only problem is they were all sticky from the sap, and looked like this:
before

So I did some research and figured out a way to "clean" them, so that they're craft ready!

➊ Remove all leaves, dirt and needles
❷ Place the pine cones on a baking tray, lined with aluminum foil*** (very important or your tray will be ruined afterwards)
❸ Bake then at 200〫  F for 20-30 min
➍ Remove them immediately from the tray or they will stick there. You'll see that most of the sap melted onto the aluminum or crystalized onto the pinecone.  They wont' be sticky anymore and can be decorated!
after
We transformed them into pine cone reindeers! So cute!

0 commentaires:

DIY crafts

Fall Leaf Garland

07:39 Natalie Karine 0 Comments

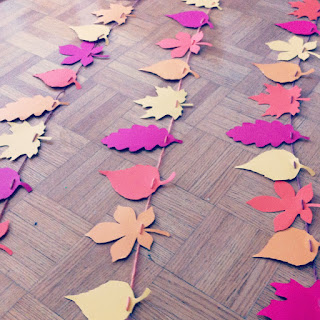
Fall colours! I just love 'em! I wanted to buy some garlands to decorate my classroom but everything was either too cheap looking (dollar store) or to expensive (craft store). So I decided to make my own! I found this awesome template one one of my favourite blogs, a Beautiful Mess. Also, it shows my students that you don't always have to buy stuff, you can make it instead!

Materials:
❧ coloured cardstock
❧ yarn
❧ needle (big one for yarn)
❧ scissors
❧ printer

Instructions:
① Download the template and print onto your cardstock (I only printed the pattern on half the sheets).
② Cut out the leaves (I cut two sheets at once - one with the image, one without underneath).
③ "Sew" the yarn into each leaf, alternating colours!
④ Voilà!
Pretty colours! 
Looks so cute on my classroom door!


0 commentaires:

School/kids crafts

#Selfie #égoportrait

17:44 Natalie Karine 0 Comments


Hi again! On our first day and her new class I decided to present a fun project to my students. After talking about what we expected from each other I asked them what they looked forward to the most. Then I asked them to write it in a little bubble and post it on top of a selfie they made in the tiny iPhone. This was a really cool project and the kids were so excited. We put music on while they were drawing and it was the perfect project to start off on the right foot, in a new class!
I got the idea off this amazing French Website, la classe à Karine. Check it out HERE!

They even made apps!
So many selfies!
Hashtag signs (the kids thought it was the COOLEST!)


0 commentaires:

Decorated Classroom! Version 2.0

17:40 Natalie Karine 0 Comments

Hi there! I found out last week that I was changing schools because I got a permanent position! I had one week to pack up my grade 2 classroom and then one day to set up my new grade 4 class. What a crazy week this has been! So here it is if you want to take a virtual tour. I reused a lot of my other stuff and there's some new things in there too. The kids loved it and one boy even told me today how he loved his new classroom and how he liked how I decorated it!

I love the transformation! Hooray!

Before
After! Love the blue paper I bought for the bulletin boards.
Nice, clean and colourful!
We made some selfies to decorate! And for the kids to leave
their mark in their class! :) Check out the project HERE
My "new" reading corner! Got to use all my stuff!
Some geography...
Added this today to help the kids with "reading" time! :)
Check it out HERE
Of course I brought my festive pompoms with me!


0 commentaires:

School/kids crafts

Classroom Flower Clock

17:11 Natalie Karine 0 Comments

Hi there! I recently started in a grade 4 (this time I'll be staying there till June, for sure, because it's a permanent position-YAY!). I soon realized that the kids still have trouble reading the clock, especially the minutes. So I decided to make a flower clock to help them out. This is something I've always wanted to do and it took no time at all. All you need is a printer coloured paper and some scissors. And it looks so pretty too!

Here is a free template:
Teachers pay teachers

Happy crafting!

0 commentaires:

DIY crafts

Decorated Classroom!

06:13 Natalie Karine 0 Comments


Hi there! What a crazy two weeks. After lots of extra hours and lots of running around, my classroom is all functional (and beautiful!) and has had 20 tiny little kiddos learning, playing and laughing in it all week long! I wanted to give you a tour since there are a lot of hand made/DIY things in there.

Happy viewing!


What I walked into,


Some details.....
of course a welcome sign!
Some easy DIY tissue paper pompoms
(tutorial HERE)
My math corner
My reading corner 
Pillows! 2$ inserts from ikea
and handmade removable and washable covers
(easy tutorial here)
bought some funky letters but made my own little flags
( with patterned paper, a hole punch and ribbon!)
Some fake flowers inside one of my fav gifts EVER!
Some games, mostly from my childhood.
Thanks mom for keeping all this stuff!
Especially my brother's legos! Big hit with the kiddos!
More flags!
and a fun "all about me banner" made by every student


0 commentaires:

DIY cards

Tiny Banner Card

15:47 Natalie Karine 0 Comments

My lovely cousin had a baby shower today and I realized I forgot to make a card to go with my gift! No worries though, I go out my scraps of paper and whipped something up! I made a card with tiny pennant banner on it! Easy and fast to make! While the glue was drying, I got ready to go out! :) Happy crafting!

Materials
♥ coloured cardstock
♥ scraps of patterned paper
♥ glue
♥ scissors
♥ black marker
♥ coloured string

Instructions
❶ Fold your coloured cardstock in half to make a card (I like to make mine square).
❷ Cut up a bunch of tiny triangles with patterned paper.
❸ Glue down a string making a curved line (see picture above).
❹ Glue your little triangles along the string.
❺ Write a message/greeting with a black marker (mine means congratulations in French!).
You're done!

So cute with this pink gift!

0 commentaires:

DIY cards

DIY Confetti Card

20:30 Natalie Karine 0 Comments


 Hi again! I wanted to share these super easy to make confetti cards with you! I've made them a couple times now and all you need is some cardstock, a black marker, some coloured/patterned paper, a hole-punch and some glue!

① Fold a piece of coloured cardstock in half.
② Write a message/word with a black marker, (Happy birthday, congrats, etc)
③ Punch out a whole bunch of little circles from patterned paper using a hole punch.
④  Randomly glue your circles on your card.
Voilà!
Before getting covered in "confetti"
Beautiful! 
Simple message with black marker.
Paper collage and confetti!
Love these easy to make cards!

0 commentaires:

BABY,

DIY Gifts for Baby Boy

20:12 Natalie Karine 1 Comments

Hi there! I just had the pleasure of hosting a very special baby shower. My friend wanted books as gifts, so I found her adorable ones... but I just HAD to make something too! As always I went on a Pinterest frenzy trying to find new DIY sewing projects to do after hitting up a killer sale at my local fabric store! I'm so happy with my sweet bibs, soft receiving blanket and cute stuffed monster! Instead of posting my own tutorials, why don't I just show you where I found these fabulous ideas!?

Happy viewing!

Killer fabric sale at Fabricland!

I used flannel on one side and quilting cotton on the other.


Flannel Receiving Blanket

Materials:
 ♥ One yard of patterned fleece
 ♥ One yard of quilting cotton
 ♥ coordinating thread

Instructions 
found here, on the Stay at home artist blog.


Flannel/cotton bibs complete with side snap-button! 

Bibs with side snap button

Materials:
 ♥ 1/2 yard of patterned fleece
 ♥ 1/2 yard of quilting cotton
 ♥ coordinating thread
 ♥ Snap-button kit and hammer

Instructions 
found here, on the Craft Passion blog. I did not make a chenille bib, but i used the great pattern and the snap button idea!


Cutest little DIY matching monster! I love him!


DIY stuffed Monster

Materials:
 ♥ 12"x 12"of patterned fleece (2 kinds)
 ♥ felt
 ♥ coordinating thread
 ♥ stuffing

Instructions 
found here, on Revoluzza.com
I threw in this completely silly book
Monster, bibs, blanket and book.... Perfect!
And of course with a handmade confetti card

Check out last year's Baby Gifts HERE!

1 commentaires: