Lovebirds

20:41 Natalie Karine 0 Comments

Tomorrow is one of my best gal pal's wedding! So what am I doing the night before the big day? CRAFTS... Naturally! I 've been making some giant tissue paper pompoms for her reception (and I made those cute little flag banners too in black, white and red...pictures to come!), but decided I needed a brake from all the folding and fluffing!

The bride-to-be at her bachelorette!


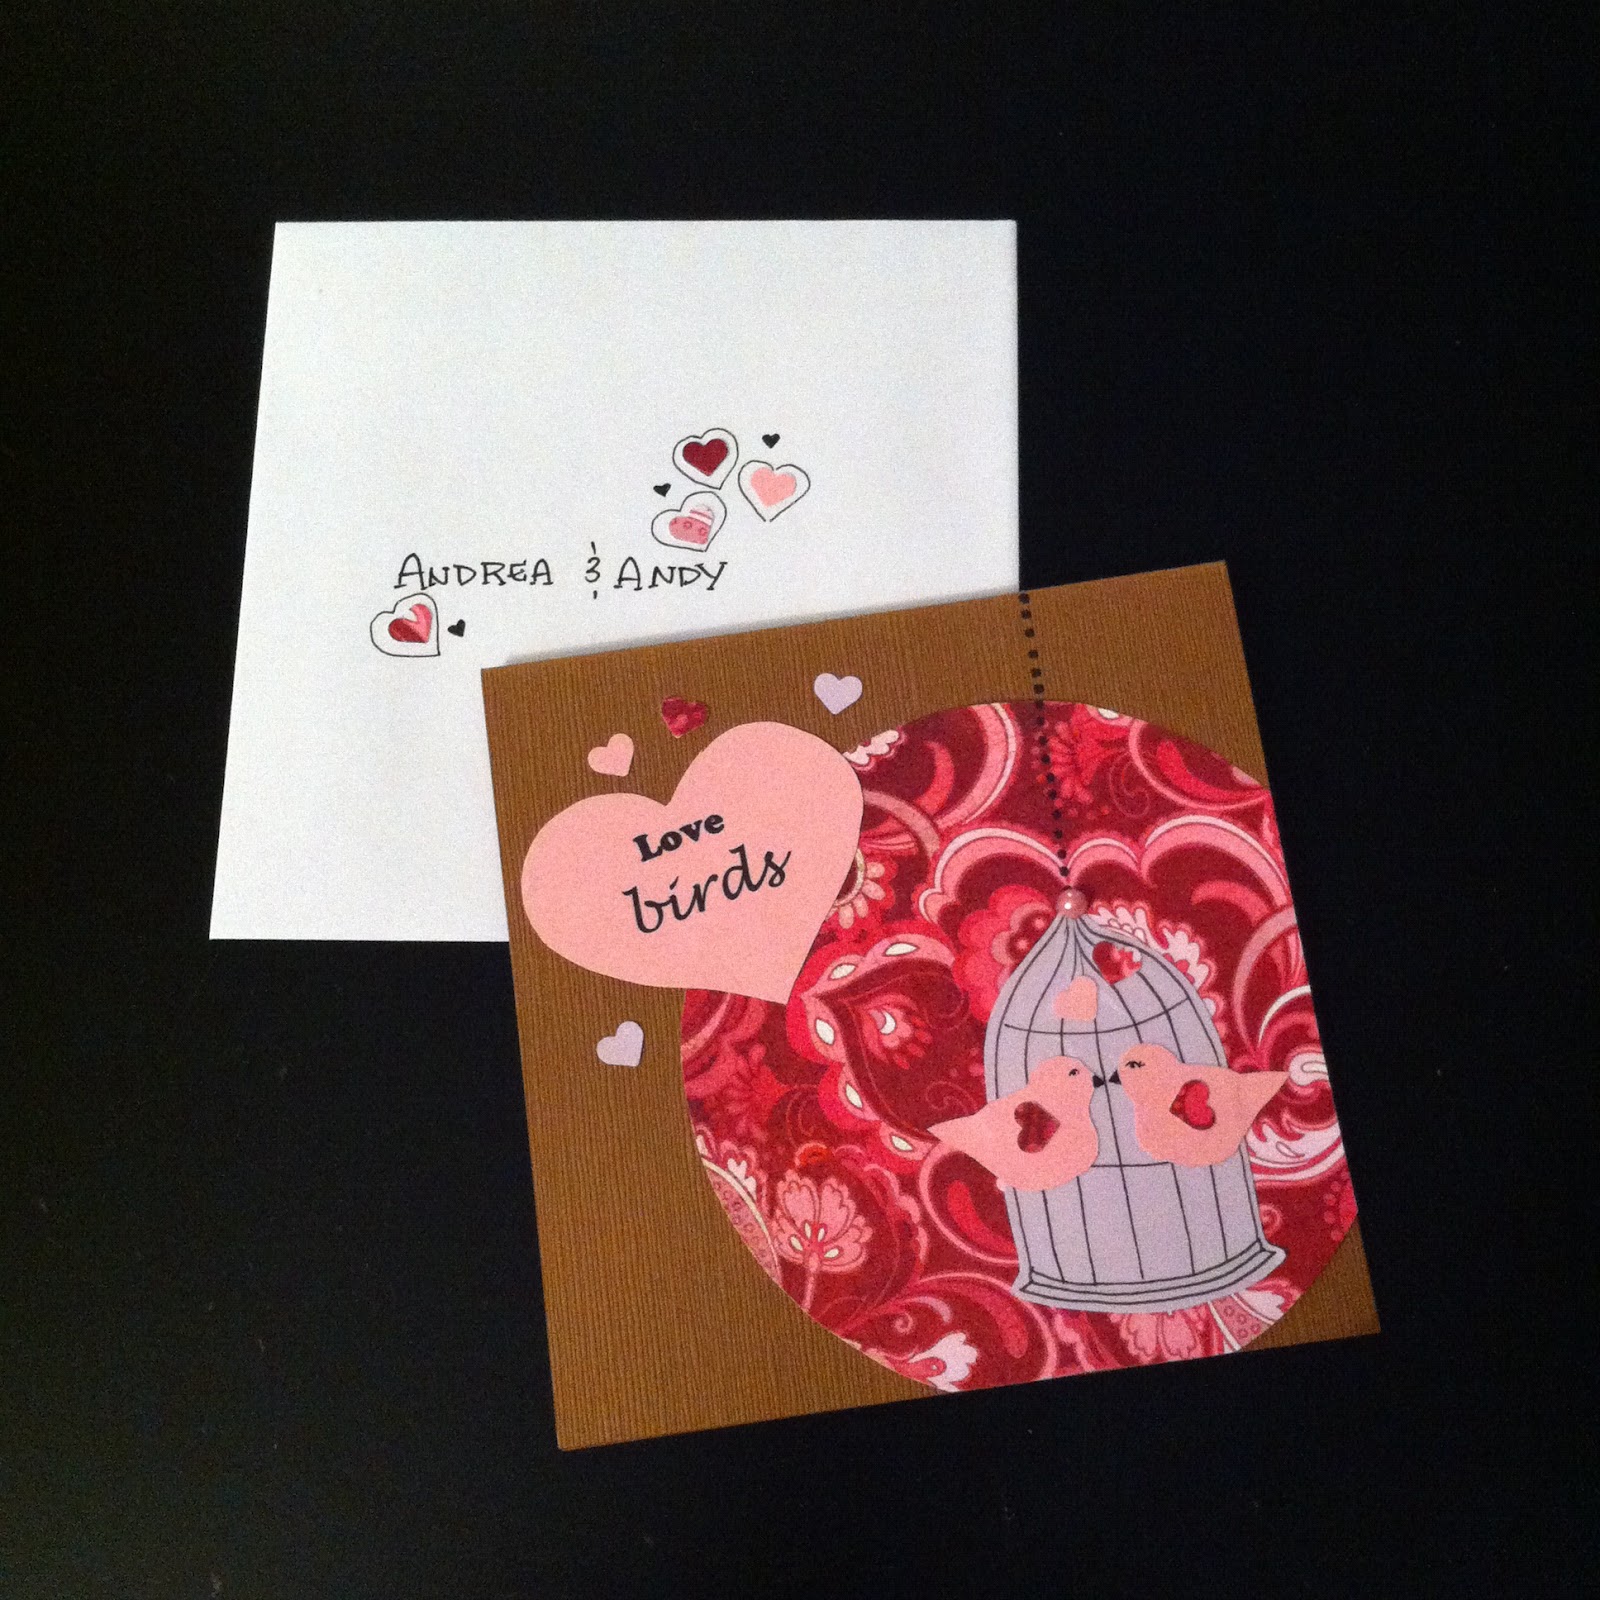
I decided to have a cup of tea and create this adorable little card for the married couple... Lovebirds! Here is the quote I included inside... it's so adorable! ♥

You know you're in love when you can't fall asleep because reality is finally better than your dreams.                      - Dr. Seuss


Gahh! Hope you've been enjoying your holidays with loved ones!

xo
Natalie

0 commentaires:

DIY crafts,

Adorable DIY Hair Bows!

13:09 Natalie Karine 1 Comments

Oh Hello friends!

I hope everyone is having some great holidays! I'm enjoying relaxing and taking a break from school!

Today I decided to make some adorable hair bows and also to create a tutorial in case you'd like to make some as well! (note the extra photoshop fanciness! Hurray vacation and extra time!) It's sooooo easy and almost no sewing  required!

Enjoy ♥

Natalie xo


               Supplies:
                     ♡ Scrap fabric
                                  - one 1.5” x 3.5” for the loop
                                  - one 8.5” x 3”for the bow
                     ♡ Scissors
                     ♡ Thread+ needle
                     ♡ Iron

①Get you supplies ready. ②Fold the longer sides of the fabric about 1cm and press with an iron. ③Take the longer piece. Fold one end towards the middle. ④ Repeat with the other end. ⑤ Bunch the middle together (make an accordion!) and sew through to secure it. ⑥ Take the smaler piece of fabric (loop), fold it in half and sew across the bottom. ⑦ Make sure the seam is an inch away from the the fold. ⑧ Turn the loop inside out and pull the bow through it. ⑨Admire your beautiful finished bow. I usually add a drop of glue to secure the loop to the bow. ⑩ Insert a boby pin in the little loop and voilà!

I made a special Christmas one for the last day at school!

1 commentaires:

Nostalgia

19:02 Natalie Karine 0 Comments


Nostalgia: definition (n.) A bittersweet longing for things, persons, or situations of the past.

I often get nostalgic when I look at old photo albums of my childhood. I know how fun and carefree it is to be a child, especially since I work with kids and witness it everyday.

The other night, I decided to go even further back in time in my parents photo albums, to a time before I was born! That happy couple going on trips, hanging out with friends, laughing...It was beautiful. It made me smile a whole lot, and I hope they smile as much when they see their Christmas gift this year.

xo Natalie


Oh and Merry Christmas friends! ♥

0 commentaires:

La Vie en Rose

21:18 Natalie Karine 1 Comments

This year, I'm going to spend Christmas up in Sturgeon Falls for the first time in a couple years (Hurray!), so I decided to make something special for my grandma. I found this old picture in my parent's photo album of her and my Grandpa (who's no longer with us).

It's one of the most beautiful pictures I've ever seen.

I hope you enjoy this painting as much as I enjoyed making it.


I think Edith Piaf was actually writing about my Mémère and Pépère when she wrote La vie en rose.

xo Natalie


I also included this card behind the painting...

1 commentaires:

DIY cards,

Nuts About the Holidays.

20:52 Natalie Karine 0 Comments


I Loooooove handmade cards! They add a little special touch to any gift!

This year, for my holiday cards, I decided to do squirrels! (Get the title now....Nuts? Squirrels! Hah! I love lame puns!) Last year was birds.... And who knows what it'll be next year!


0 commentaires:

Sewing

DIY IPhone Sleeve!

06:33 Natalie Karine 1 Comments


I have a confession: I love my Iphone.... a lot. Who can resist? It does everything! "How do I spell this word?" BAM! "Who's in that movie again?" BAM! "What should we eat tonight hon?" BAM! "I need to renew my library books!" BAM! And the list goes on...

Unfortunately, these little smart phones are pretty pricy! So let's make sure we protect the little guys with a beautiful padded sleeve/pouch! Oh and everyone that's gotten one as a gift from moi LOVES it! And all you need is a scrap of fabric! ☺
Kitties!


       What you'll need!
            ☆ Scrap fabric (a piece for the outside and the linning)
            ☆ Quilting Batting
            ☆ Interfacing
            ☆ Sewing machine


Here are the dimensions for the fabric: (I added 1/4”  all to every dimension since I have a plastic cover on mine)

• 2 pieces of fabric 10.75” x 4”
• 2 pieces of fusible interfacing 10.5 ”x 3.75
• 1 piece of batting 10.5” x 3.75”
• 1 piece of fabric 2.5” tall by 2” wide for the tab

This project comes from this AWESOME tutorial that I found on the interweb! Simply follow the instructions and VOILÀ! You have an awesome Iphone sleeve (Perfect x-mas gift too!)

You can even make it for Blackberries or any phone, Ipod... Whatever! You can find those dimensions on the Internet! Oh Technology!

Happy Saturday! ♥


....More examples! Have fun with patterns!


1 commentaires:

School/kids crafts

Crafty Gift Bags!

17:29 Natalie Karine 0 Comments


Crafty gift bags with those adorable mitten gift tags!
#4 : Crafty Gift Bags!

So now that you've accumulated all these fun projects how do you wrap them up?! Decorate a blank gift bag!

The best part about this is that each bag can be so different! My colleague Jess said it best : "each bag is like a blank canvas!"

So all you need is some plain kraft- paper bags (You can also get them in funky colours at craft stores) and some paint, crayons or markers. Add some sparkles for some extra flair... et voilà! A BEAUTIFUL handmade wrapping job! 


More bags!

Here's a non-christmasy variation of the project I did for last father's day! I simply traced the image onto the bag with a marker! So fun! My Dadou loved it!


0 commentaires:

School/kids crafts

Fancy Mitten Gift Tags!

17:26 Natalie Karine 0 Comments

# 3: Fancy mitten gift tags!

So for the past two weeks it's been craft city at school! We are accumulating a bunch of special handmade projects! After our winter concert, the kids will get to give all their precious creations to their parents in a gift bag! And how do we know which on belongs to who?! Gift tags!


To make this easy craft, you'll need:
        ❄ White cardstock (or thick paper)
        ❄ Crayons
        ❄ Scissors & hole puncher
        ❄ Yarn or ribbon
        ❄ Glitter!

Start by ① Cutting out your mitten shape. You can either make a stencil that the kids will trace or even pre-cut the mitten (check out Martha Stewart's template here). ② Colour your mitten with a fun pattern on one side. On the other write your name (from: ...)! ③ Fancy-it up with glitter! ④ Punch a hole, tie a string and attach to your gift! TA-DAM! ❄


So, so beautiful!

0 commentaires:

DIY cards,

Christmas Tree Cards! For kids!

16:52 Natalie Karine 0 Comments


# 2: Christmas tree cards!           

These are so so easy to make and the kids love them! When you open them, you get a whole Christmas tree! And even though most of my students are too young to write, they drew a big heart to say "I love you" to their parents and signed their names! They say pictures are worth a thousand words! ♥


                              What you'll need:
                               ❅ Green cardboard/paper
                               ❅ Various stickers
                               ❅ Crayons
                               ❅ Sparkles
                               ❅ Glue


To make these cute cards, You'll need to: 1. Pre-cut the tree shapes. I drew a stencil first and traced it on the green construction paper then cut them out. 2. Decorate! Draw, put stickers on... go crazy! 3. Make it fancy! With white glue, make patterns like garlands or swirls, then sprinkle sparkles on! Have fun with it! 

Joyeux Noël! ♥

0 commentaires:

School/kids crafts

Cute Clothespin Reindeer!

12:40 Natalie Karine 0 Comments


Happy Holidays!


Christmas is in the air! The kids are getting CRAZY excited at school! We are basically doing a different craft everyday and I decided to show you my favorites on my blog! 

#1: Clothespin Reindeer!

These guys are pretty cute and you can use cheap wooden clothespins from the dollarstore! Hurray!


     What you'll need for these guys:
          ❄ Wood clothespins
          ❄ Pipe cleaners
          ❄ Yarn/string
          ❄ Googly eyes
          ❄ Pompoms
          ❄ Glitter
          ❄ Hot glue gun

To make these guys, you need to... 1. Hot glue two clothespins together so that the the ends that "pinch" meet in the middle. 2. Paint them or draw on them with pastels. 3. Hot glue the eyes and the pompom nose. 4. For the antlers, put a pipe cleaner trough one of the little springs. 5. Attach a atring to hang in your tree! Oh and add sparkles for a final, special fancy touch!  ♥

They are all so different and soooooo cute!

0 commentaires:

Sewing

Puppets!

15:35 Natalie Karine 0 Comments

Story time in a Kindergarten is simply Magical. I must admit, it's my favorite time of the day; seeing all those different emotions on kids faces... surprise, fear, happiness! I also loooove going to the library and finding fun books, and imagining my students reactions!

Last year, during teacher's college the professor of my Preschool Class introduced me to Superlapin, a 5 year old bunny/superhero). I never forgot him. I loved him instantly. This is Superlapin, over there on the left. ←

This professor also gave us an assignment, for which I decided to create a set of puppets based on a book (I've never made puppets before, so I improvised!) They looked like this →


So when I finally introduced Superlapin to my students this year, they simply fell in love with him. Especially this one little boy. It's a love affair. So after I ran out of Superlapin books (I could only find 5) the kids were pretty sad, particularly that little boy.

Until.... wait for it... the Superlapin puppet!

Now I can make up an infinite amount of stories about Superlapin! The kids are so excited. You should've seem their faces today when I showed them. Ah. Priceless. Their joy is pretty contagious. ♥

Happy Friday everybody! xo

Oh and here's how I created my little friend!
Cut out a basic shape
Sew the edge and flip right side out
Stuff it!
Make tiny clothes+ accessories
Assemble + glue on details
Paint finishing touches and a face!


0 commentaires: